vSphere#
This document is provided for users who use VMware vSphere provider and helps them set up basic configurations on VMware vSphere to meet the needs of running SkyPilot tasks.
Prepare Category & Tag#
The Categories and Tags is needed when using the vSphere provider, please follow bellow steps to create them.
Create the Category:
Open web browser and Login your vSphere Client.
Navigate to Menu -> Tags & Custom Attributes.
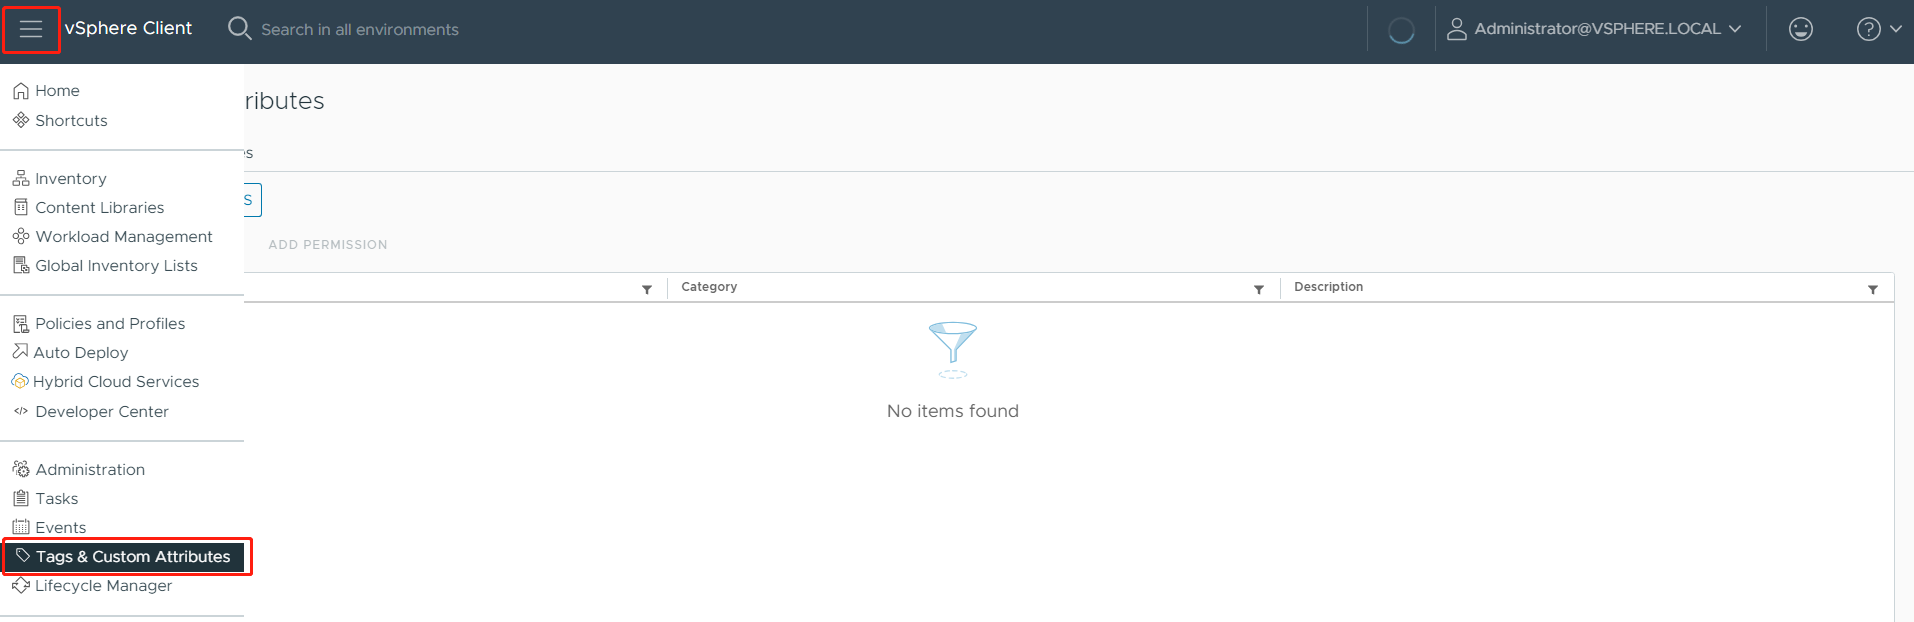
Click Tags -> CATEGORIES -> NEW.
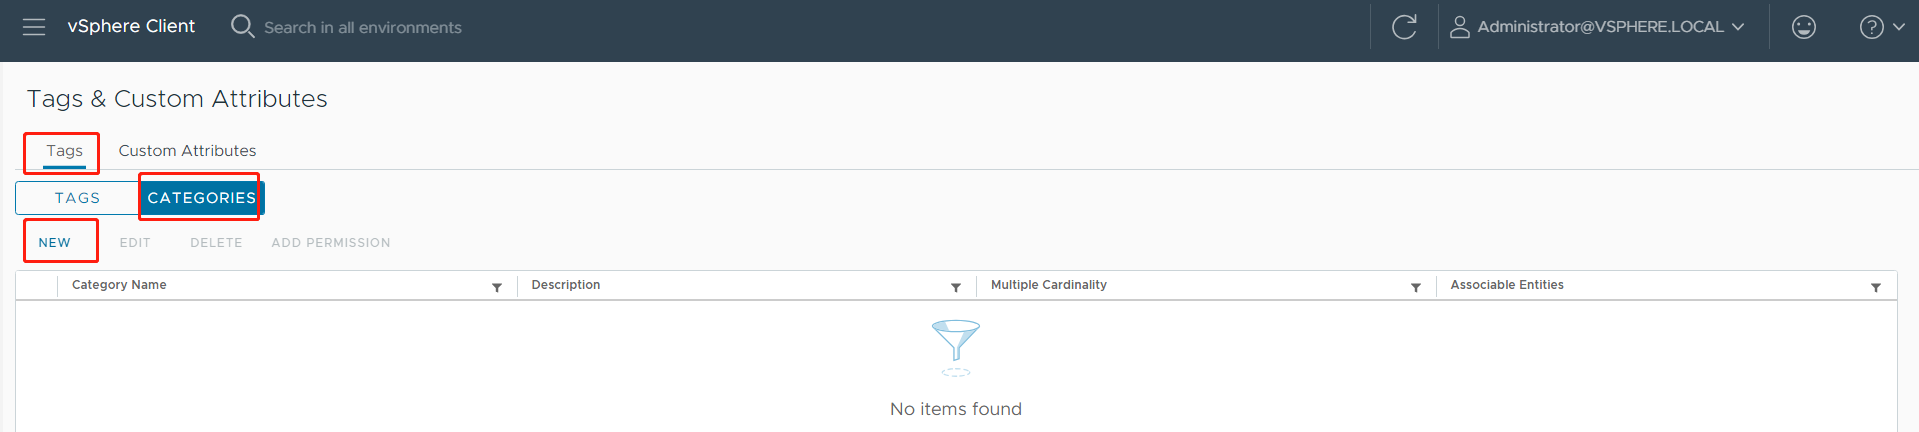
Fill in the Create Category form with follow content:
Category Name: skypilot
Tags Per Object: Many tags
Associable Object Types: Datastore, Content Library, Library Item, VirtualMachine

Click the CREATE to finish the creation.
Create the Tag:
Open web browser and Login your vSphere Client.
Navigate to Menu -> Tags & Custom Attributes.
Click Tags -> TAGS -> NEW.
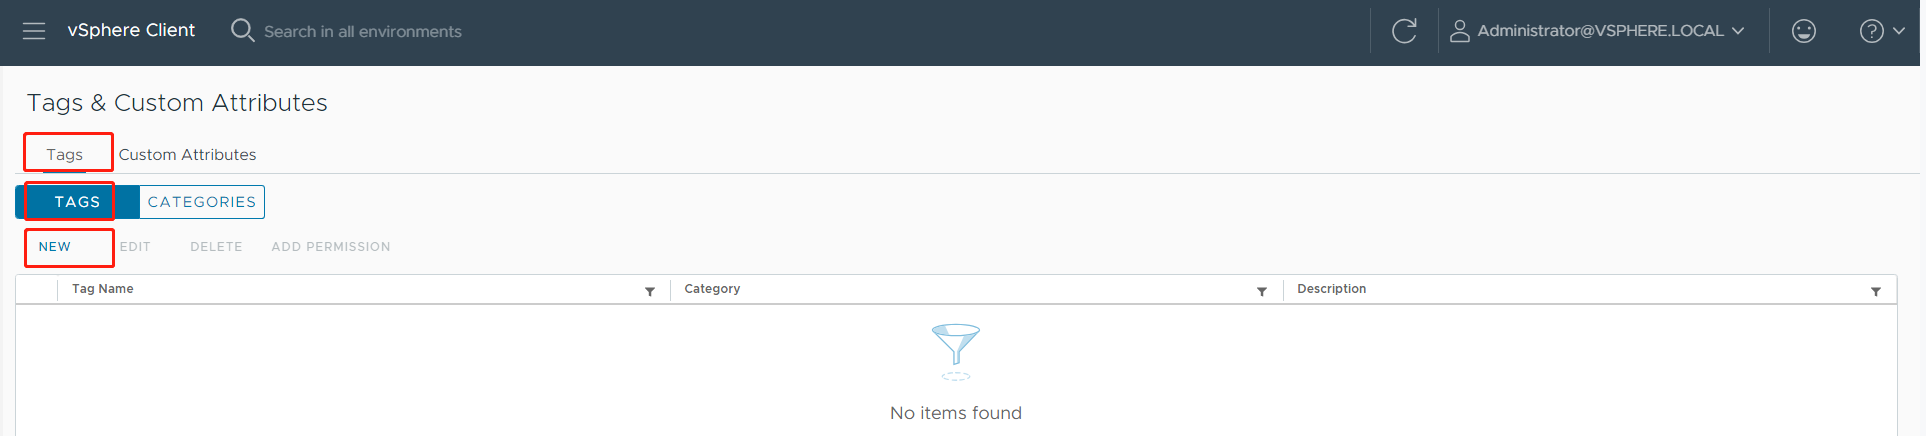
Fill in the Create Tag form with follow content:
Name: skypilot
Category: skypilot

Click the CREATE to finish the creation.
Create VM Storage Policies#
The vSphere provider depends on the VM Storage Policies to place the VM. A Shared Datastore is recommended.
Open web browser and Login your vSphere Client.
Navigate to Menu -> Inventory.
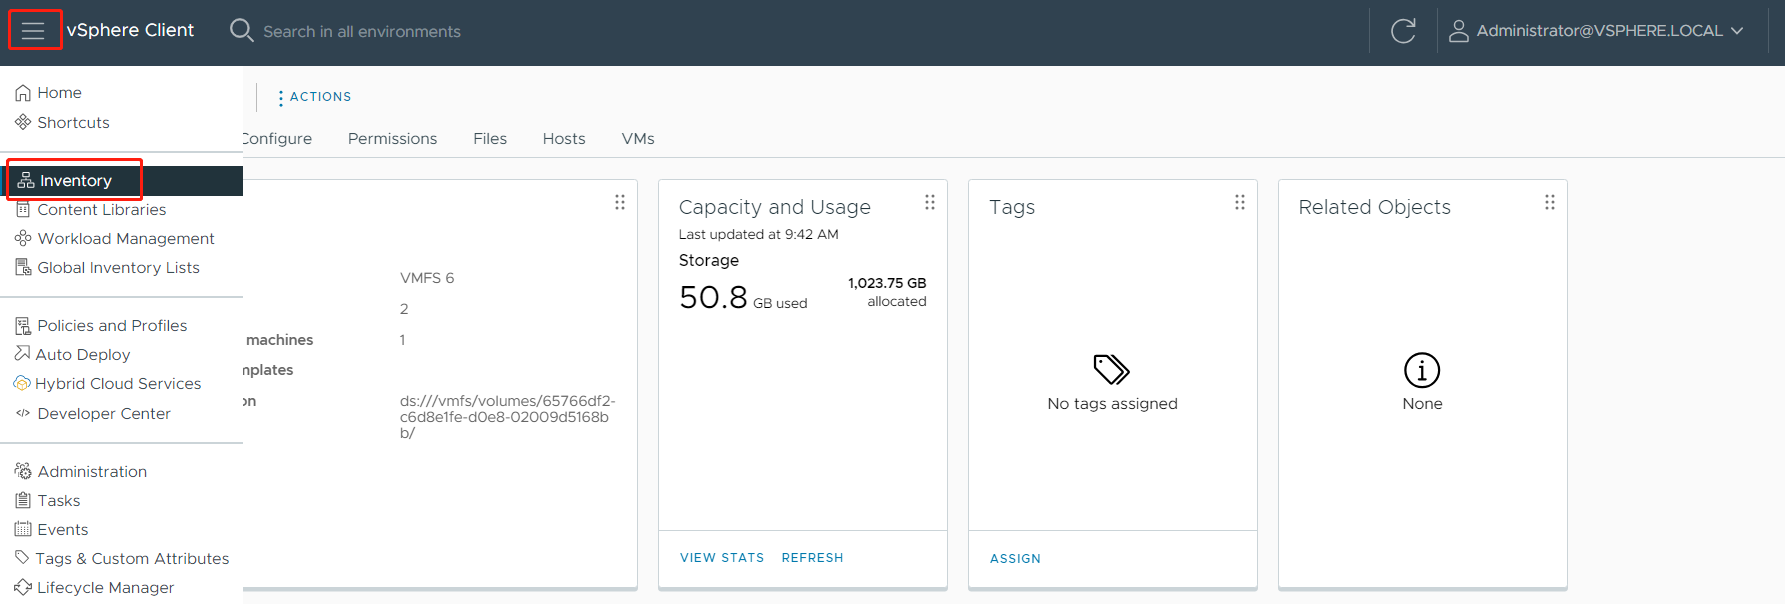
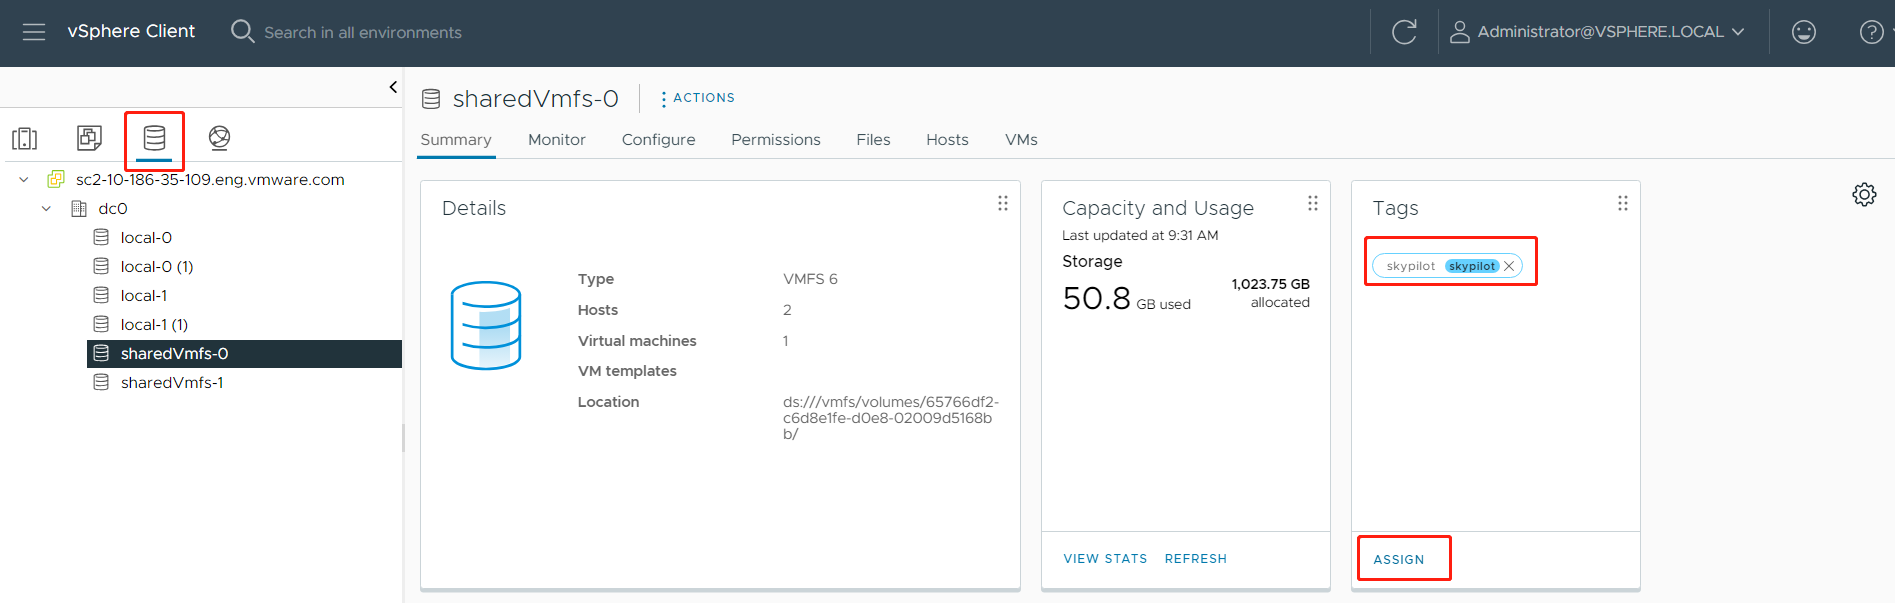
Click the Datastore Icon.
Select the datastore eligible for VM creation, assign the previously created
skypilottag to them.
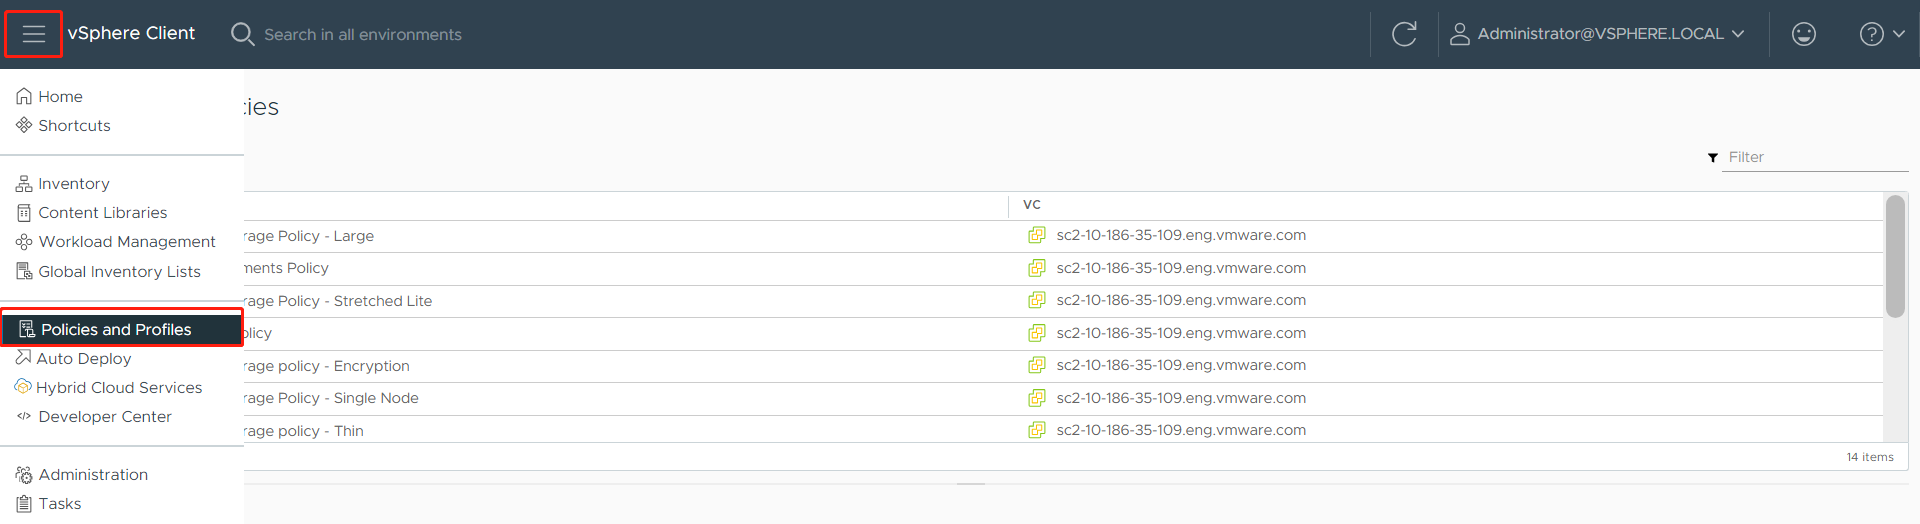
Navigate to Menu -> Policies and Profiles.
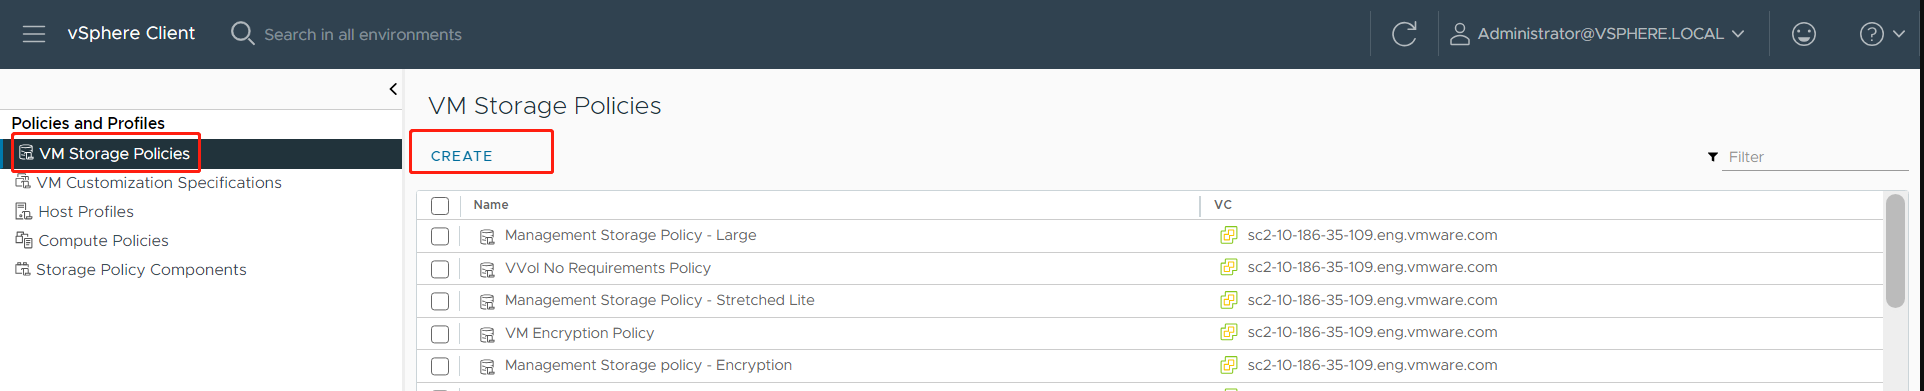
Select VM Storage Policies , and click CREATE button.
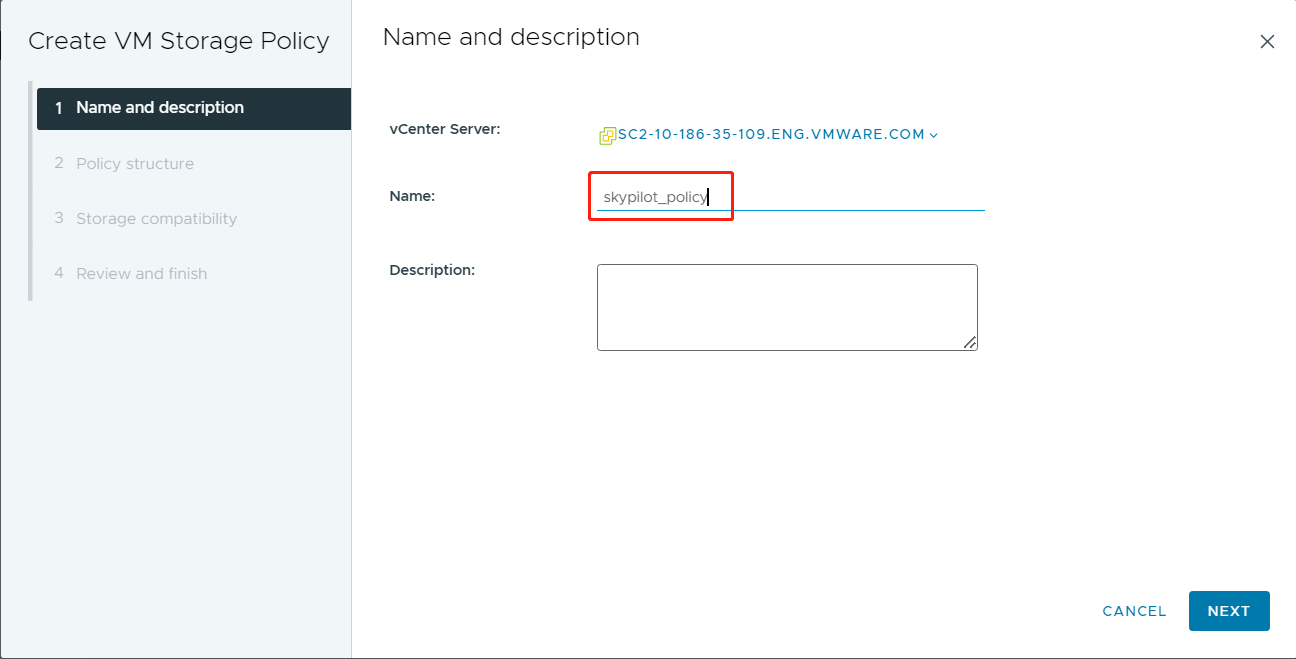
In the Name and description step, specify the name as
skypilot_policy.
In the Policy structure step, select Enable tag based placement rules.
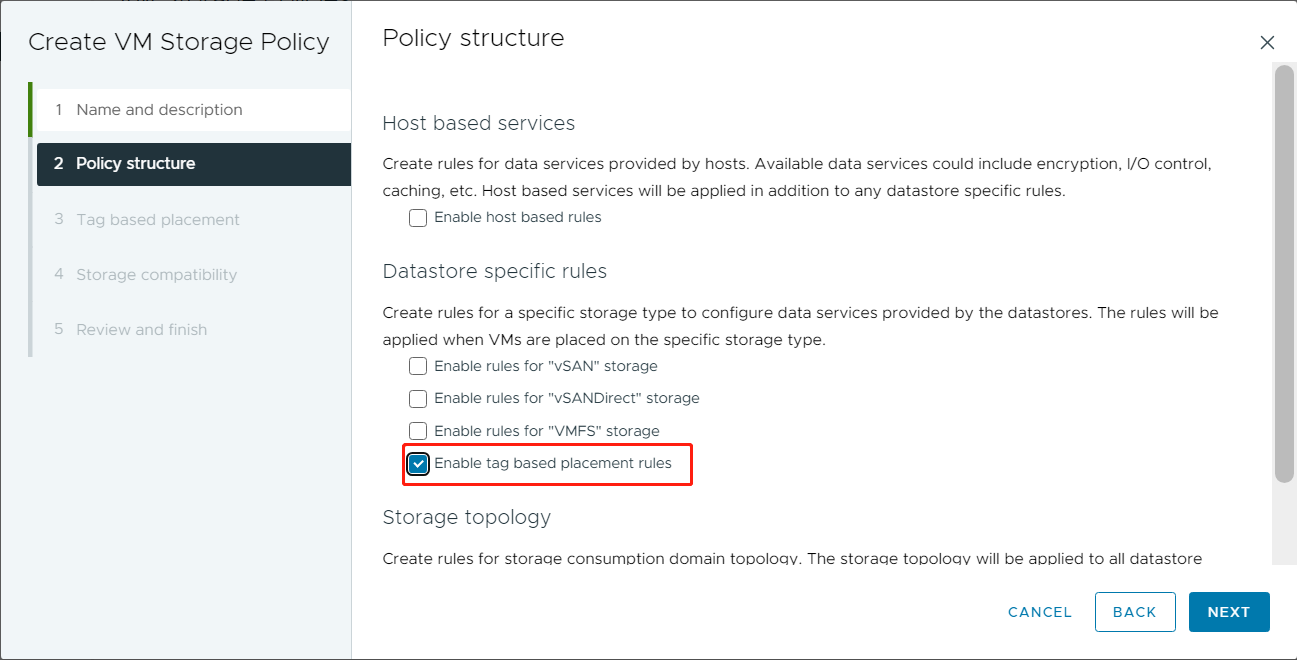
In the Tag based placement step, select the tag skypilot.
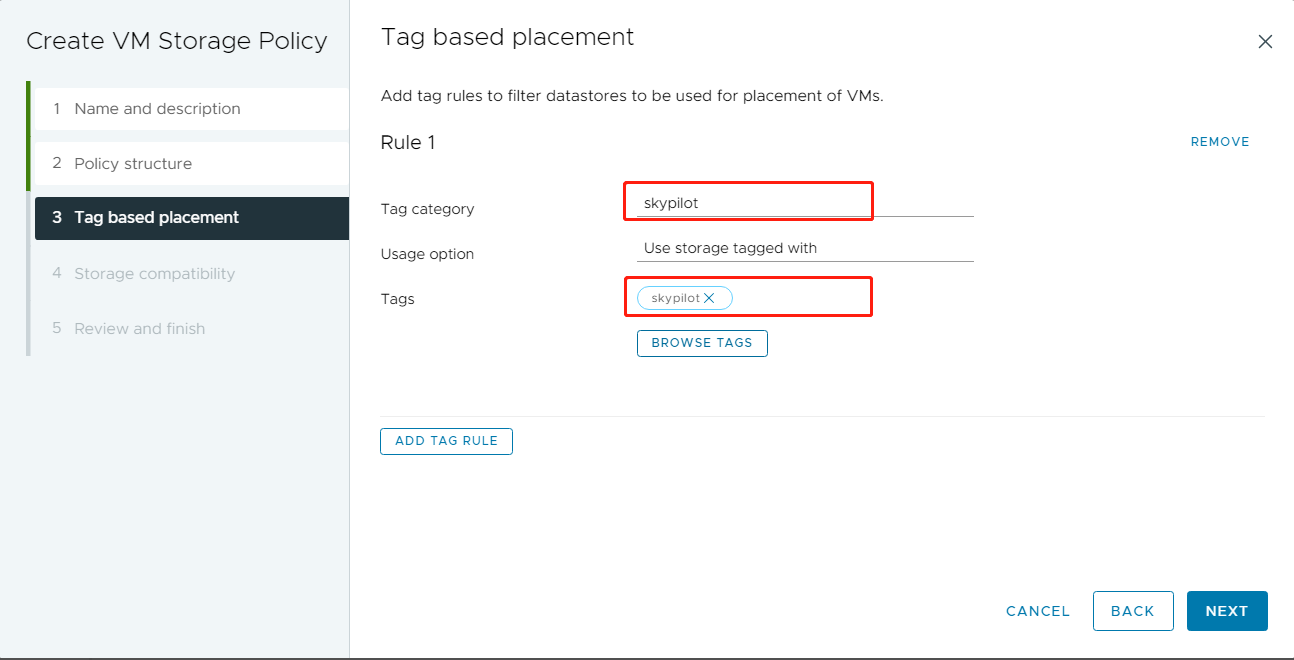
In the Storage compatibility step, review the datastores.
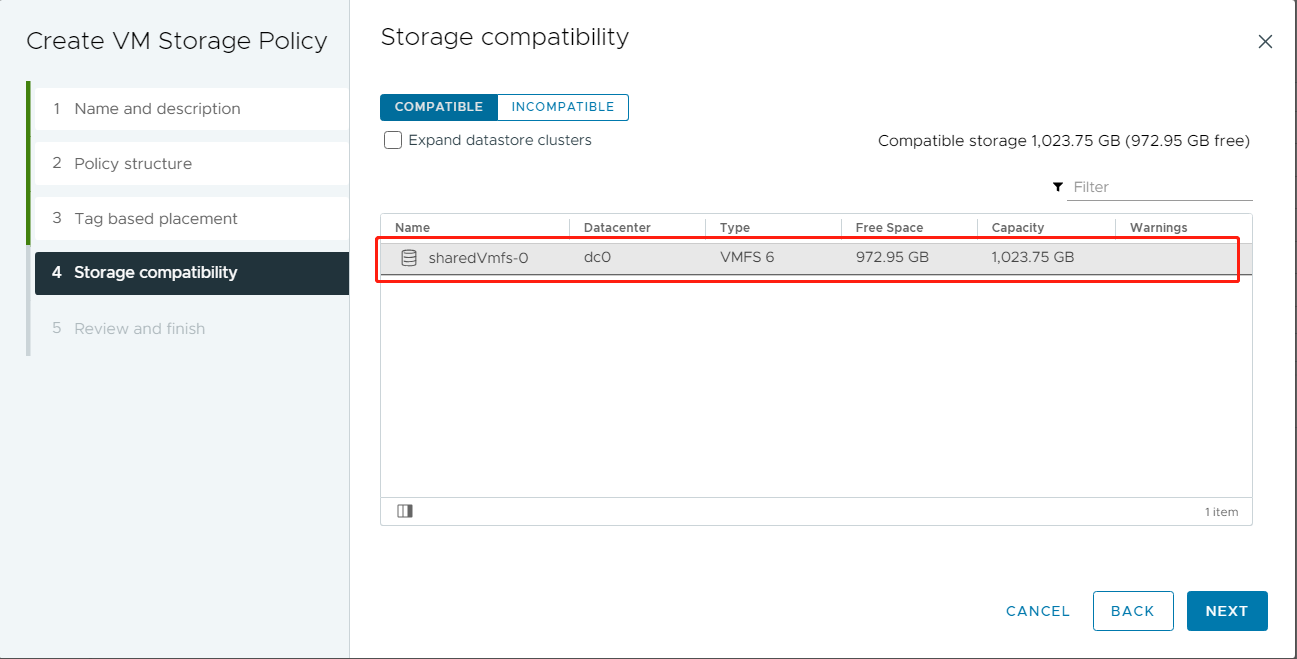
Review and Click the FINISH to create the policy.
Prepare VM image#
The VM must be Linux-based; we take Ubuntu 20.04 as the base OS in this document. Other Linux distributions may also works but not promised.
Step 1. Prepare a linux-based VM.
Open web browser and Login your vSphere Client, create a linux-based Virtual Machine.
If you’re unfamiliar with the process of creating a virtual machine, please refer to this guide for assistance: Deploying Virtual Machines
Step 2. Create a user and Enable password-less sudo.
Login your prepared VM, Create a user named ubuntu, and add to the sudo group.
sudo adduser ubuntu
sudo usermod -aG sudo ubuntu
Edit the sudoer file to enable passwordless sudo.
sudo visudo
Add the following line:
ubuntu ALL=(ALL:ALL) NOPASSWD: ALL
Step 3. Check VMtools version.
Execute the following command to check VMtools version 10.1.0 or later is required.
vmware-toolbox-cmd -v
Step 4. Enabling Custom Scripts in VMtools.
Execute the following command to check if the enable-custom-scripts option is enabled:
sudo vmware-toolbox-cmd config get deployPkg enable-custom-scripts
If the enable-custom-scripts option is disabled, enable it by executing:
sudo vmware-toolbox-cmd config set deployPkg enable-custom-scripts true
Step 5. Install the GPU driver.
Different GPUs require different drivers; please choose the correct driver based on your GPU mode and OS version. Take Ubuntu and Nvidia GPU for example, the following driver works for most of the case:
sudo apt install nvidia-headless-535-server --no-install-recommends
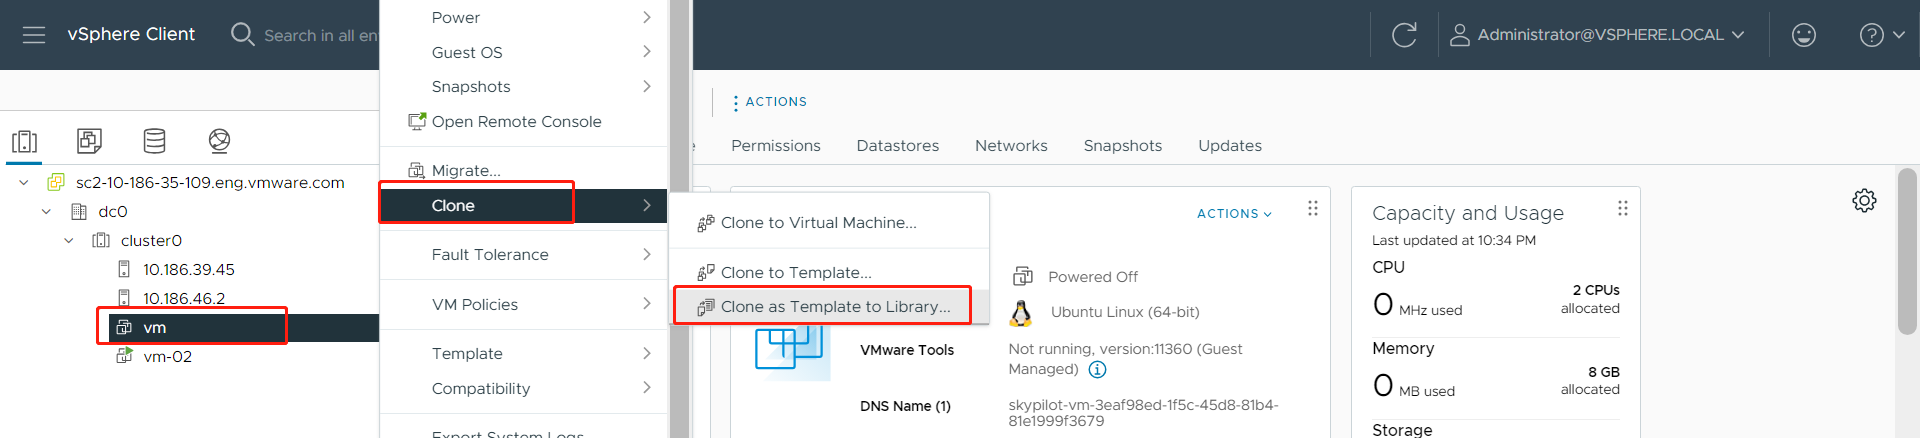
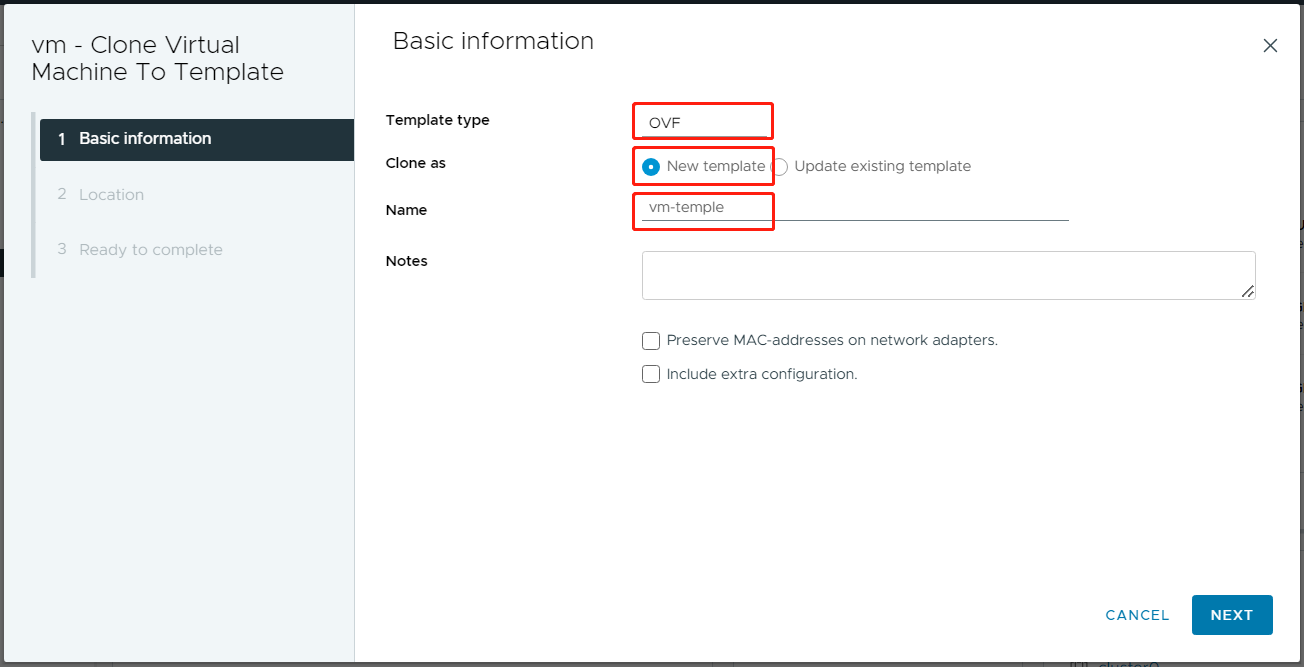
Step 6. Convert the VM to template.
Power off the VM.
Select the VM and right click -> Clone-> Clone as Template to Library.
Select Template type: OVF, provide the template name and click Next.
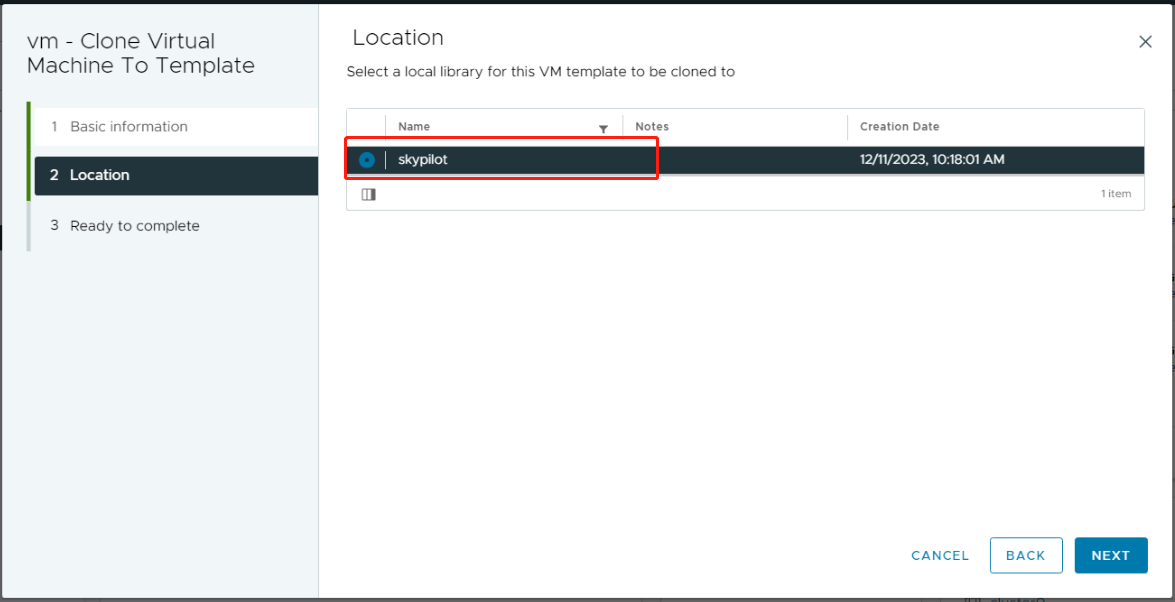
Select a Content Library location and click Next.
Create one if you haven’t set up a Local content library. Please refer to Create a Library
Review and click Finish.
Step 7. Tag the VM template.
Follow the steps bellow to tag the VM template:
Navigate to Menu -> Content Libraries.
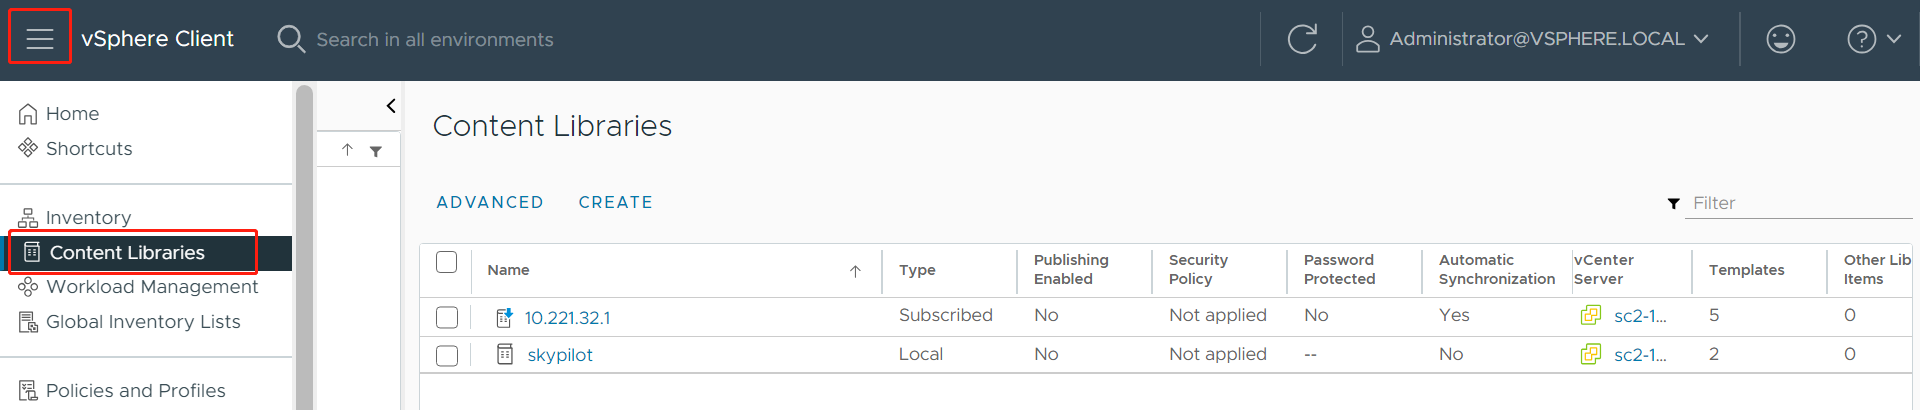
Review the content libraries and click on the one that contains your target VM templates.
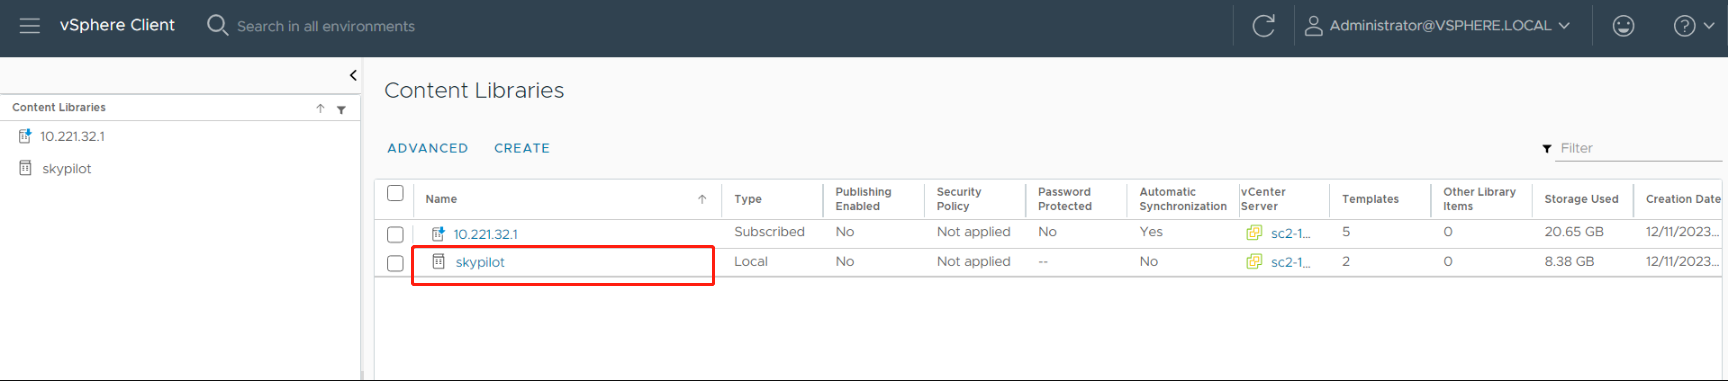
Review the content library items and click on your target VM template.
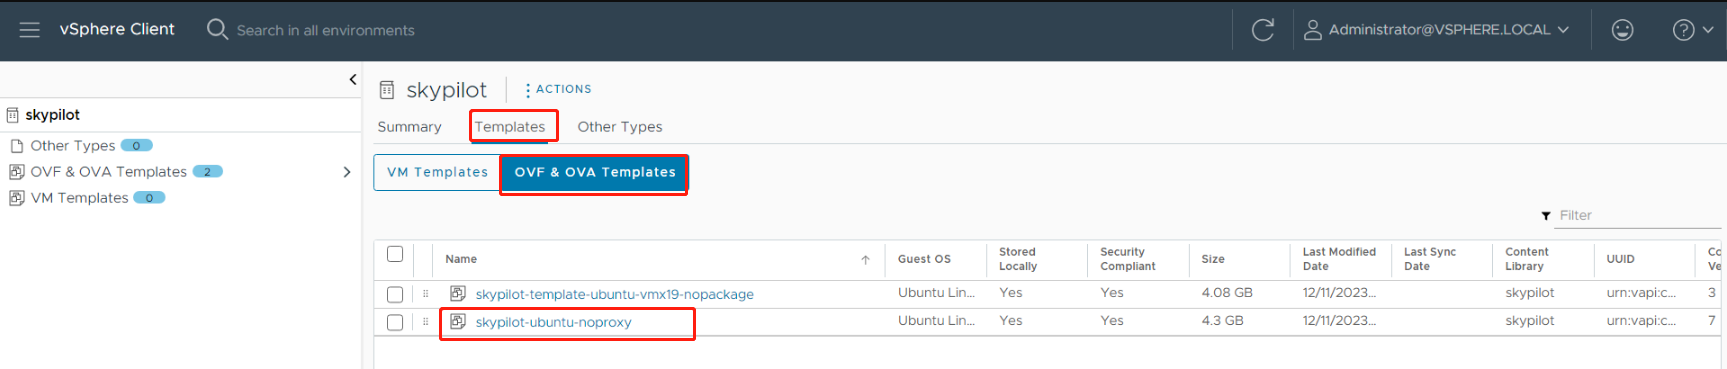
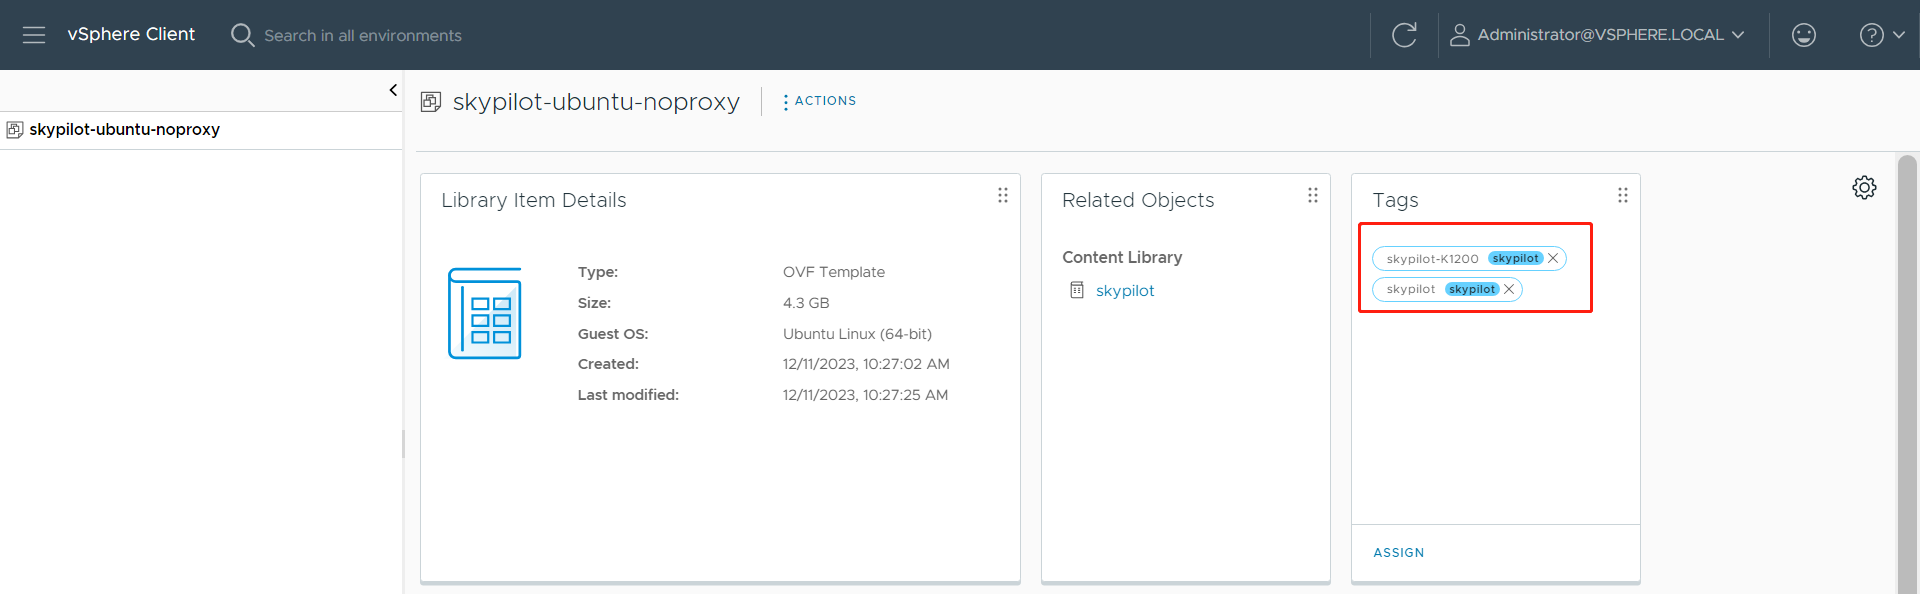
Assign the relevant tags to the VM template.
If you no sure how to assign the tags, please refer to Rules for tagging VM template
References#
Rules for tagging VM template
The vSphere driver for SkyPilot uses the Tag to identify the VM images for GPU. VI admin needs to tag the VM template accordingly in the Content Library. Here are a few rules for tagging templates:
All workloads that do not need an accelerator will use the VM image tagged with
skypilot-cpu. If you have multiple VM templates (Content Item) tagged withskypilot-cpuonly the first one will be used, so the best practice is only tagging one image withskypilot-cpu.Vi Admin should create a default VM Image for each accelerator vendor and tag it with the format
skypilot-vendornamee.g.,skypilot-nvidia. The fallback logic is if the user requires a specific Nvidia GPU(e.g., k1200) and the vSphere driver cannot find an image with tagskypilot-K1200it will use the VM image tagged withskypilot-nvidia.All the tags should select the Tag category as:
skypilot.
Support new GPU
The vSphere cloud provider has a default support GPU list. You can first check the default one by executing the sky check command.
Then the GPU list can be found in the ~/.sky/catalogs/v5/vsphere/accelerators.csv file. If you want to support a new GPU, say Nvidia K1200
you can add one more line at the end of the file:
Model,Type,MemoryMB,vCPUs,fullNames
...
K1200,GPU,4096,4,['GM107GL [Quadro K1200]']
If the GPU needs a particular driver, ask the VI admin to create a new VM template and upload it to the Content Library, then add a tag to the VM template, e.g., GPU-k1200. If the new default VM template’s driver supports the new GPU, you will not need to create a new one. For example, if the VM template with the Tag skypilot-nvidia supports the new GPU, then you will not need to create a new VM template.