GCP#
Generally, the administrator can choose among three “levels” of permissions, from the most permissive and least setup effort, to the least permissive and more setup effort:
Default: no setup, give users Owner-level permissions (i.e., you do not need to follow the instructions in this section)
Medium: easy setup, with a medium set of permissions
Minimal: more setup, with the minimal set of permissions
Medium Permissions#
The easiest way to grant permissions to a user access your GCP project without the Owner role is to add the following roles to the user principals:
roles/browser
roles/compute.admin
roles/iam.serviceAccountAdmin
roles/iam.serviceAccountUser
roles/serviceusage.serviceUsageConsumer
roles/storage.admin
roles/iam.securityAdmin
Note
If the roles/iam.securityAdmin role is undesirable, you can do the following. First, include the role and have any user (e.g., the admin) run sky launch --cloud gcp successfully once. This is to create the necessary service account. Then, replace the role roles/iam.securityAdmin with roles/iam.roleViewer in the list above.
Optionally, to use TPUs, add the following role:
roles/tpu.admin
You can grant those accesses via GCP’s IAM & Admin console.
Minimal Permissions#
The Medium Permissions assigns admin permissions for some GCP services to the user. If you would like to grant finer-grained and more minimal permissions to your users in your organization / project, you can create a custom role by following the steps below:
User#
Go to GCP’s IAM & Admin console and click on Create Role.
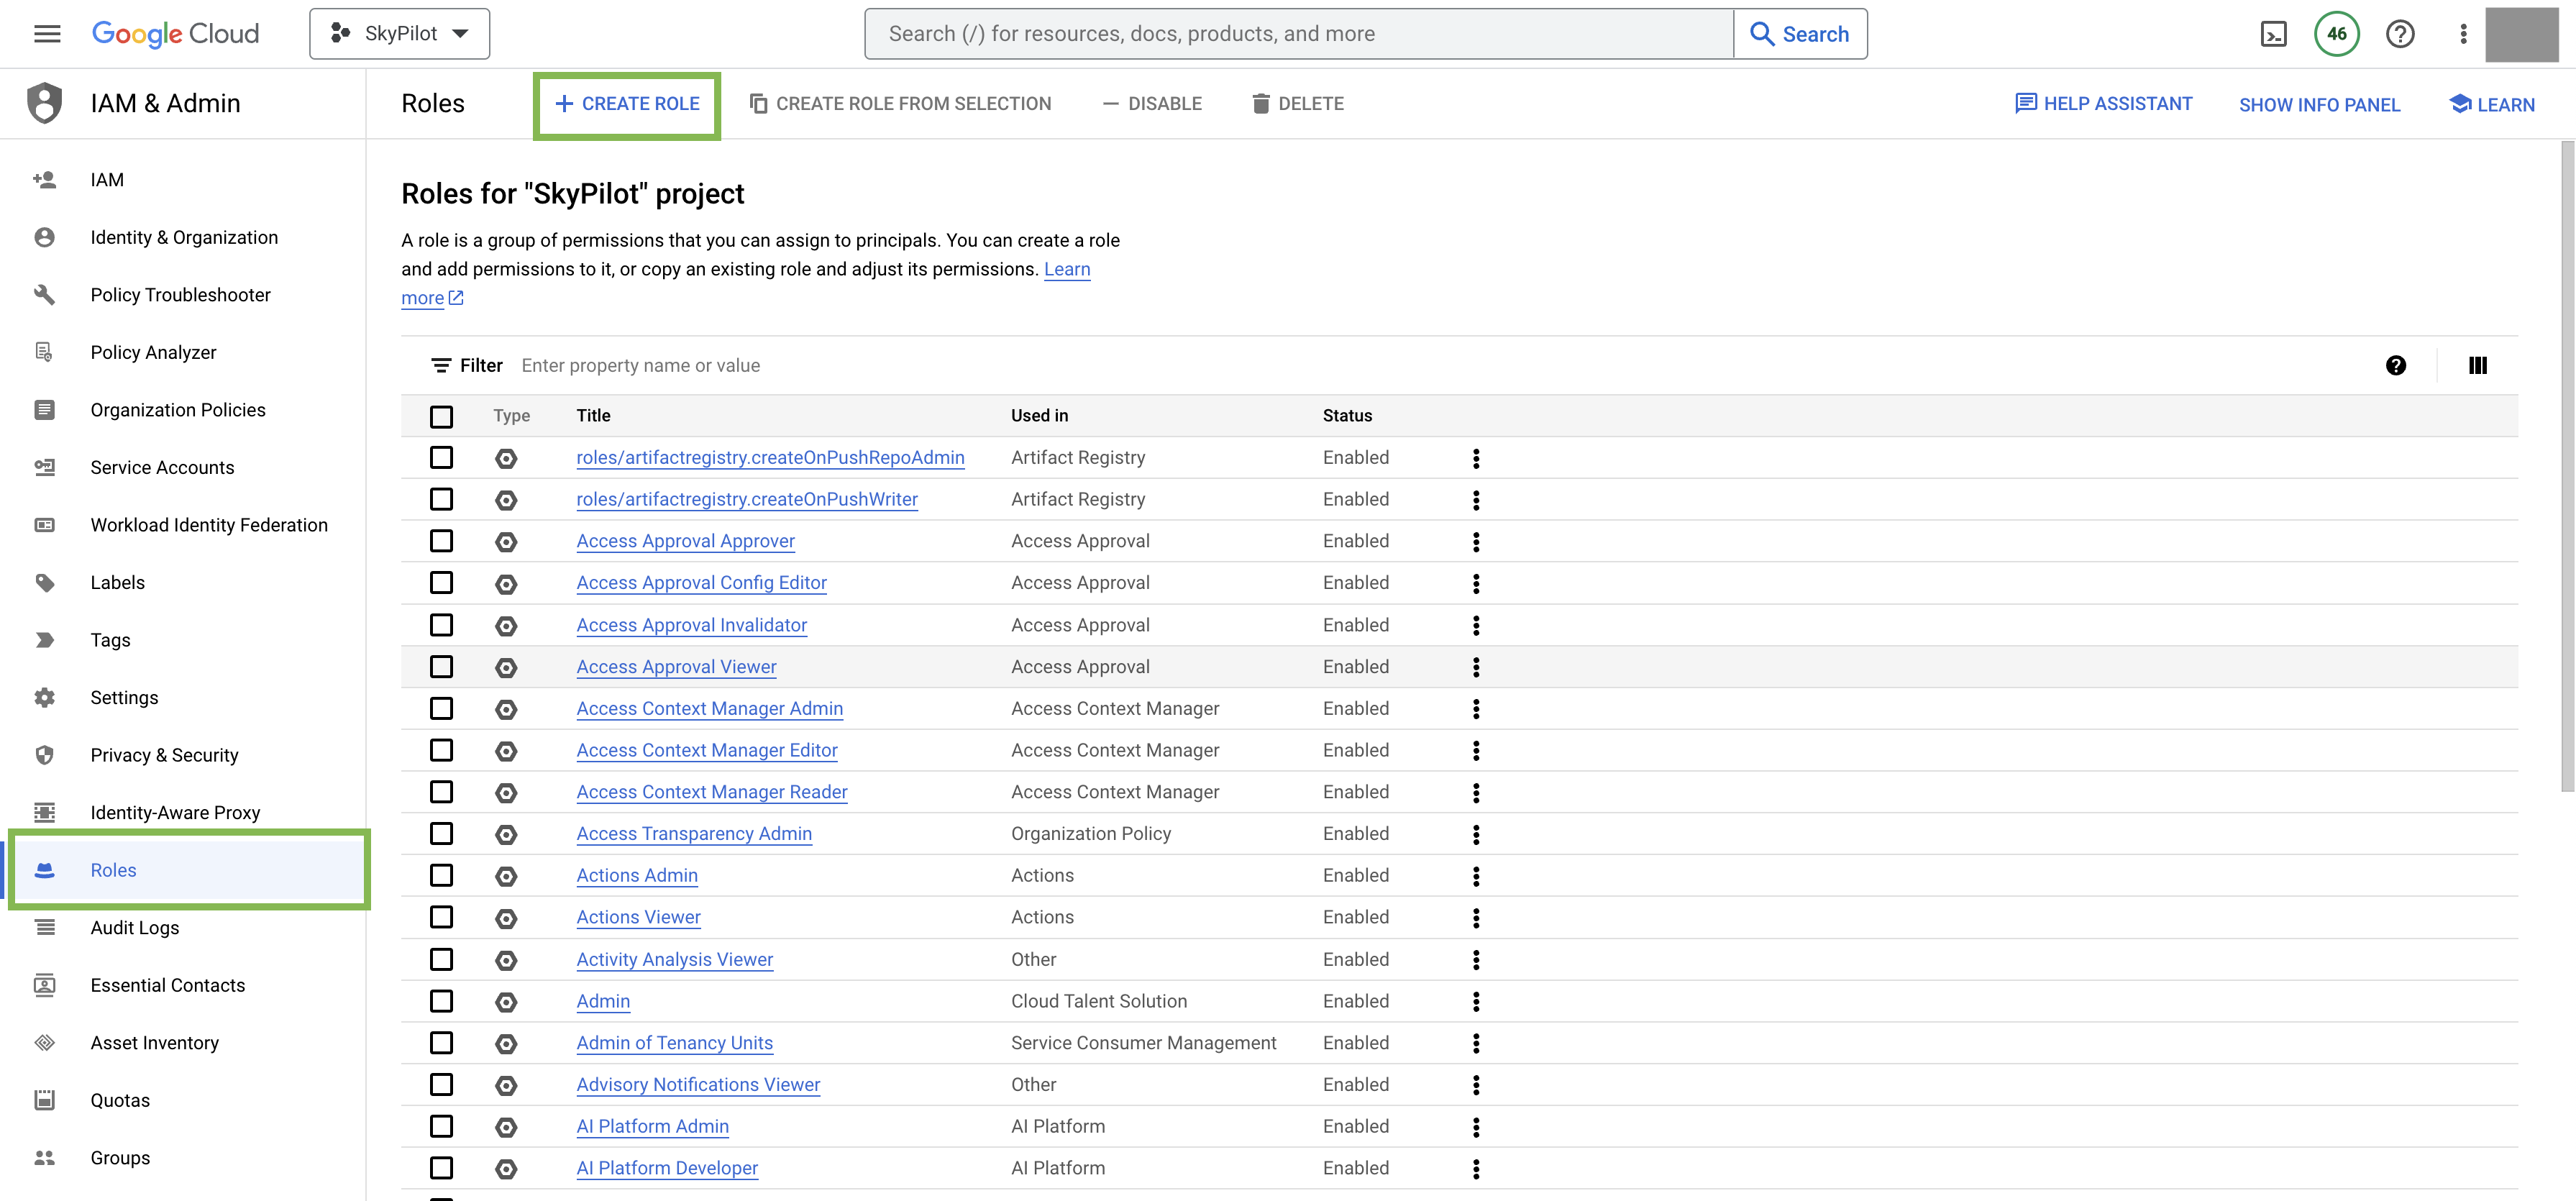
Give the role a descriptive name, such as
minimal-skypilot-role.Click Add Permissions and search for the following permissions and add them to the role:
compute.disks.create
compute.disks.list
compute.firewalls.create
compute.firewalls.delete
compute.firewalls.get
compute.instances.create
compute.instances.delete
compute.instances.get
compute.instances.list
compute.instances.setLabels
compute.instances.setMetadata
compute.instances.setServiceAccount
compute.instances.start
compute.instances.stop
compute.networks.get
compute.networks.list
compute.networks.getEffectiveFirewalls
compute.globalOperations.get
compute.subnetworks.use
compute.subnetworks.list
compute.subnetworks.useExternalIp
compute.projects.get
compute.zoneOperations.get
iam.roles.get
iam.serviceAccounts.actAs
iam.serviceAccounts.get
serviceusage.services.enable
serviceusage.services.list
serviceusage.services.use
resourcemanager.projects.get
resourcemanager.projects.getIamPolicy
Note
For custom VPC users (with gcp.vpc_name specified in ~/.sky/config.yaml, check here), compute.firewalls.create and compute.firewalls.delete are not necessary unless opening ports is needed via resources.ports in task yaml.
Note
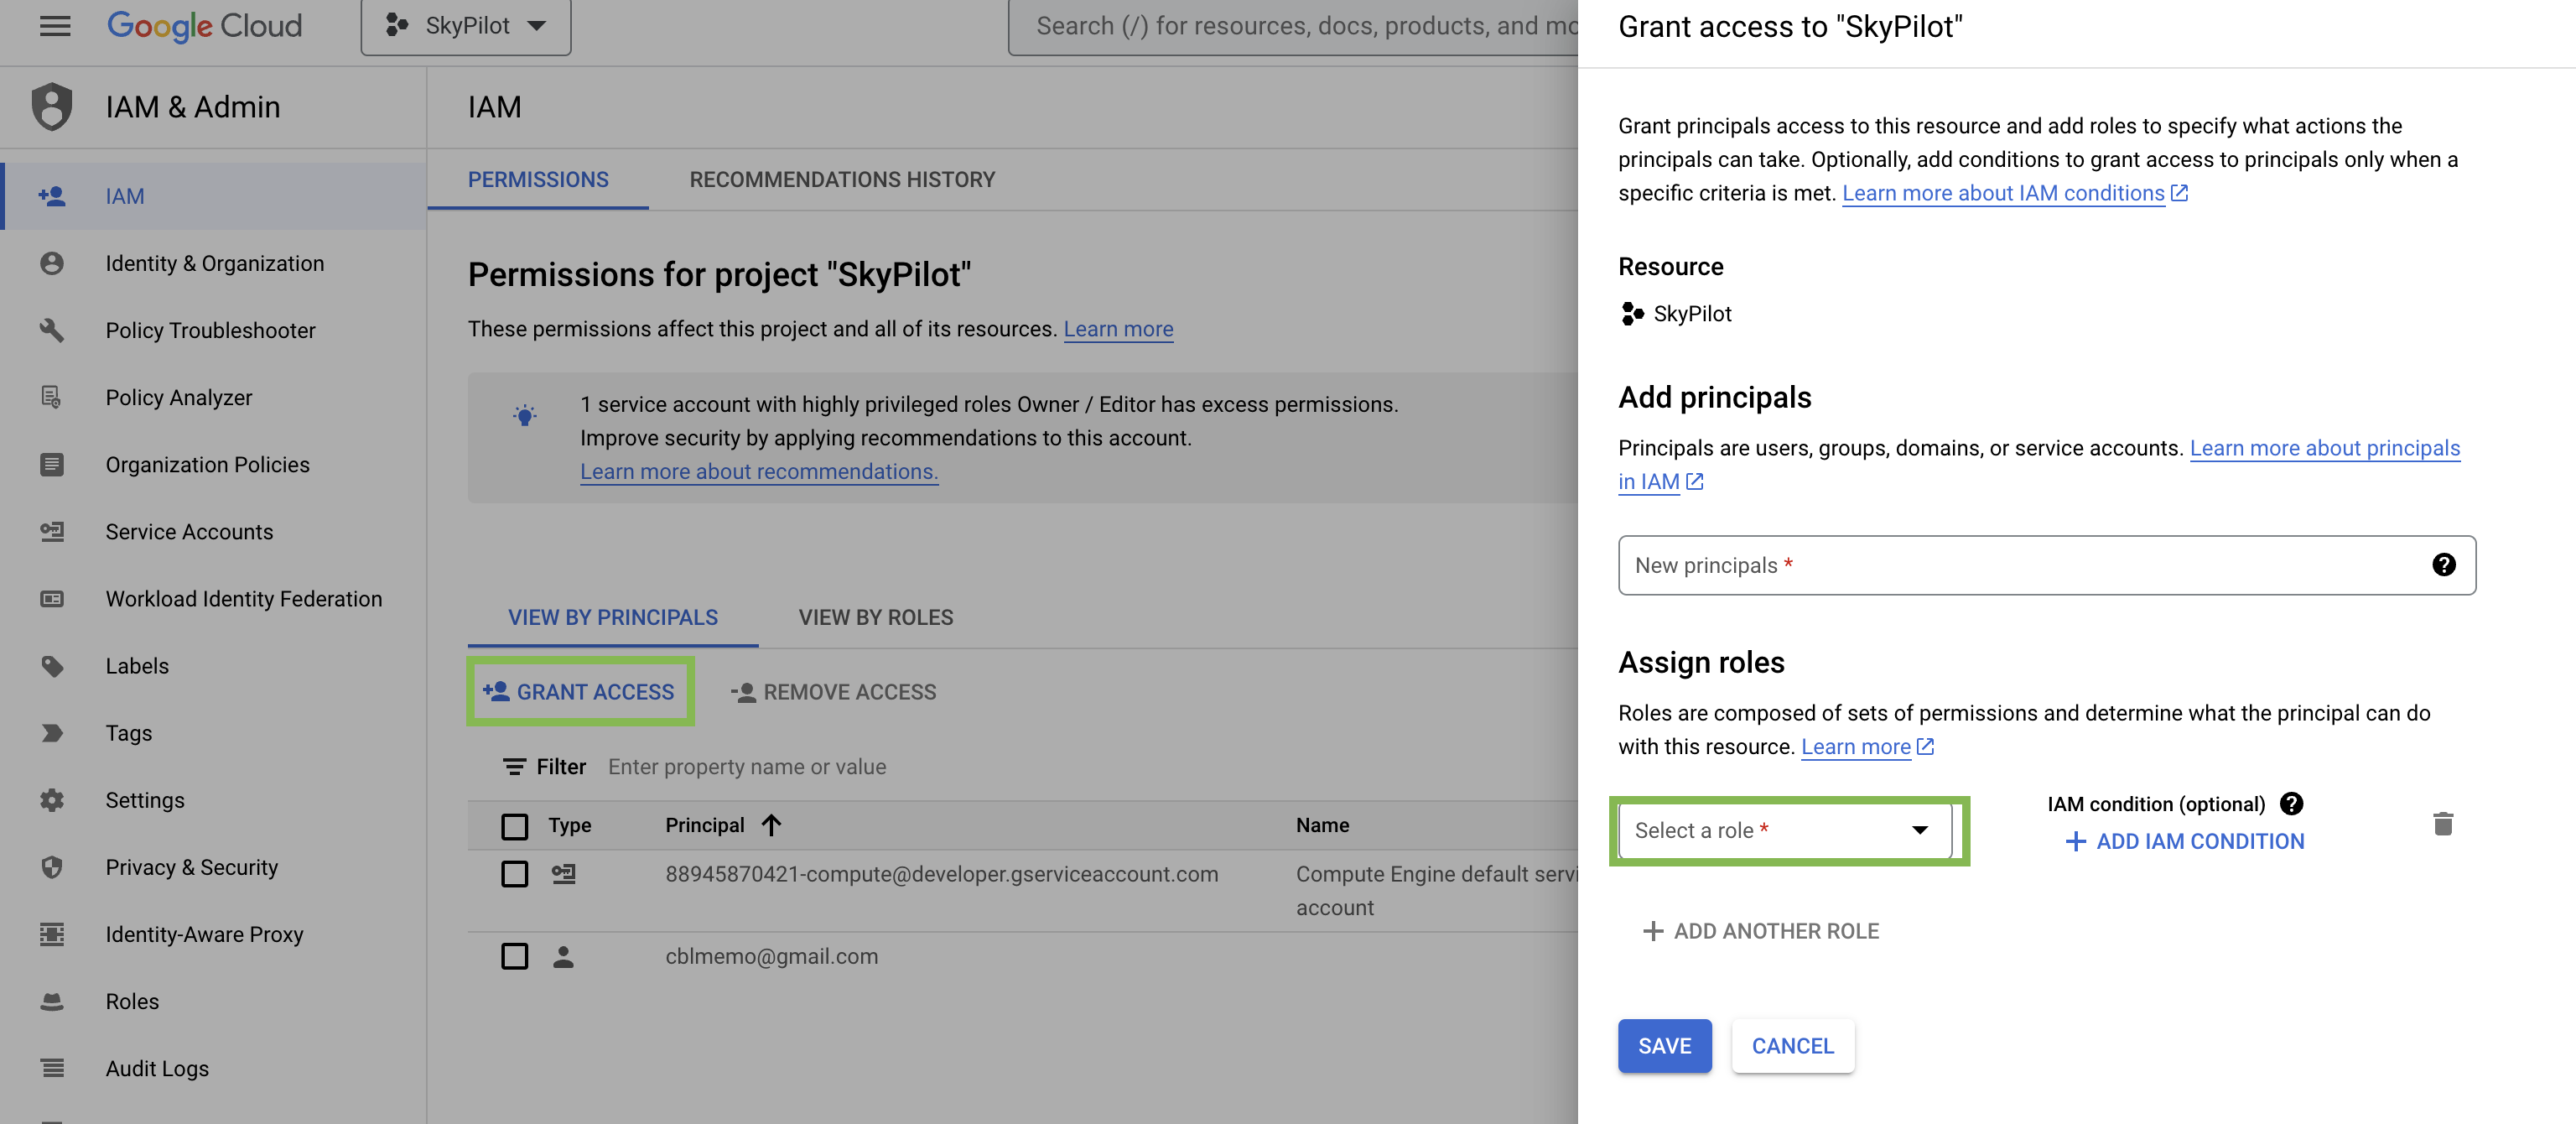
(Advanced) To further limit the iam.serviceAccounts.actAs permission to access SkyPilot’s service account only, you can remove the permission from the list above and additionally grant your organization’s users the ability to use the service account skypilot-v1 created by the admin (see Service Account). This can be done by going to IAM & Admin console -> Service Accounts -> skypilot-v1 -> Permissions -> GRANT ACCESS and adding the users with role roles/iam.serviceAccountUser. This permits the users to use the skypilot-v1 service account required by SkyPilot.
Optional: If the user needs to access GCS buckets, you can additionally add the following permissions:
storage.buckets.create
storage.buckets.get
storage.buckets.delete
storage.objects.create
storage.objects.update
storage.objects.delete
storage.objects.get
storage.objects.list
Optional: If the user needs to access TPU VMs, you can additionally add the following permissions (the following may not be exhaustive, please file an issue if you find any missing permissions):
tpu.nodes.create
tpu.nodes.delete
tpu.nodes.list
tpu.nodes.get
tpu.nodes.update
tpu.operations.get
Optional: To enable
sky launch --clone-disk-from, you need to have the following permissions for the role as well:
compute.disks.useReadOnly
compute.images.create
compute.images.get
compute.images.delete
Optional: To enable opening ports on GCP cluster, you need to have the following permissions for the role as well:
compute.instances.setTags
compute.firewalls.list
compute.firewalls.update
Optional: If the user needs to use custom machine images with
sky launch --image-id, you can additionally add the following permissions:
compute.disks.get
compute.disks.resize
compute.images.get
compute.images.useReadOnly
Optional: If your organization sets
gcp.prioritize_reservationsorgcp.specific_reservationsin ~/.sky/config.yaml, you can additionally add the following permissions:
compute.reservations.list
Click Create to create the role.
Go back to the “IAM” tab and click on GRANT ACCESS.
Fill in the email address of the user in the “Add principals” section, and select
minimal-skypilot-rolein the “Assign roles” section. Click Save.
The user should receive an invitation to the project and should be able to setup SkyPilot by following the instructions in Installation.
Note
The user created with the above minimal permissions will not be able to create service accounts to be assigned to SkyPilot instances.
The admin needs to follow the instruction below to create a service account to be shared by all users in the project.
Service Account#
Note
If you already have an service account under “Service Accounts” tab with the email starting with skypilot-v1@, it is likely created by SkyPilot automatically, and you can skip this section.
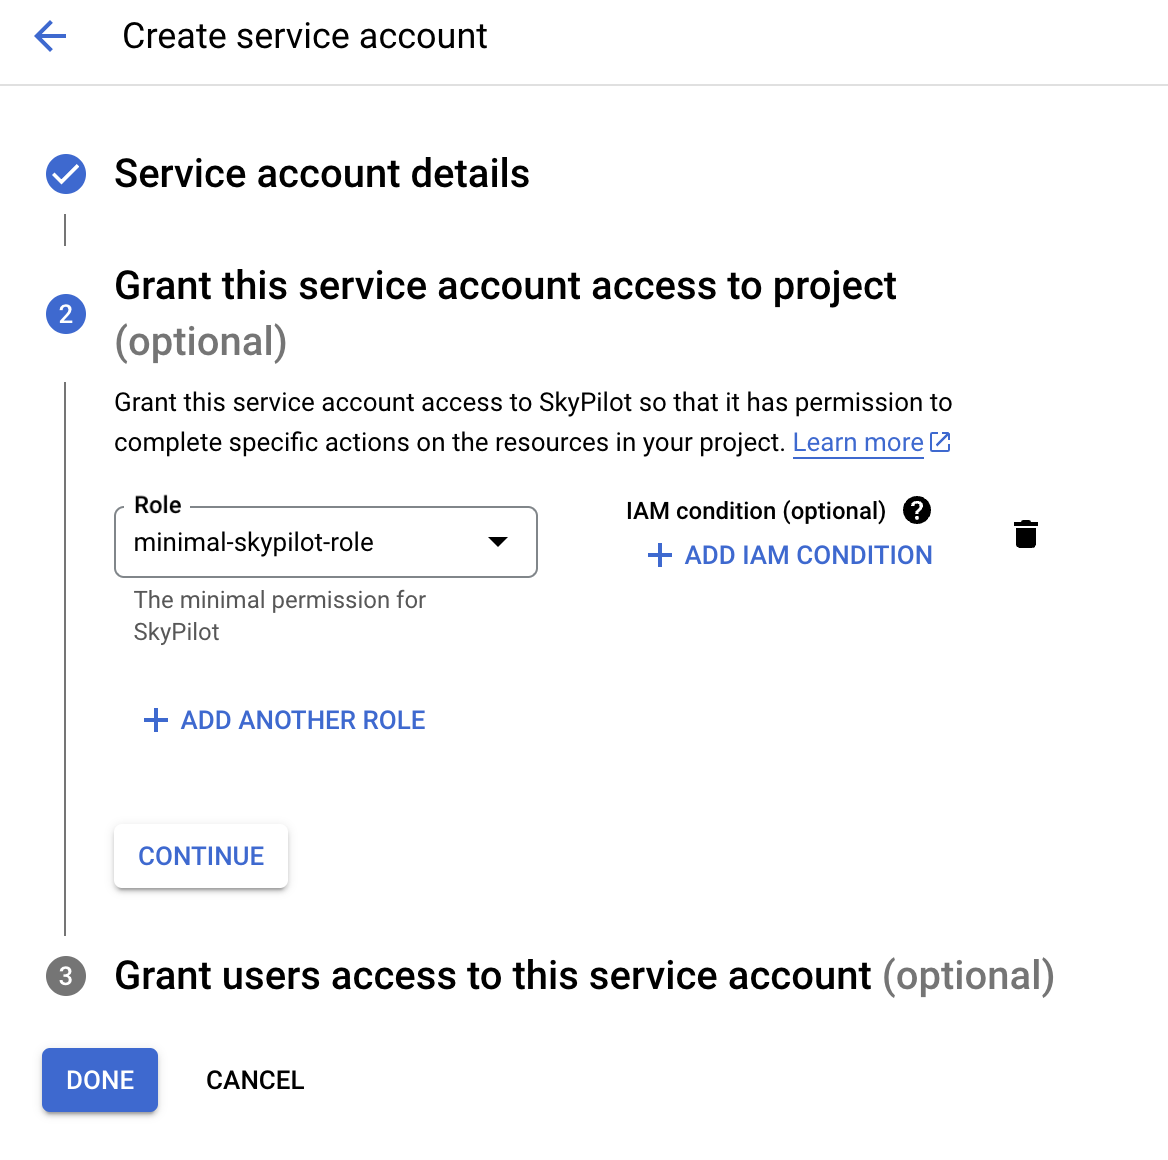
Click the “Service Accounts” tab in the IAM & Admin console, and click on CREATE SERVICE ACCOUNT.
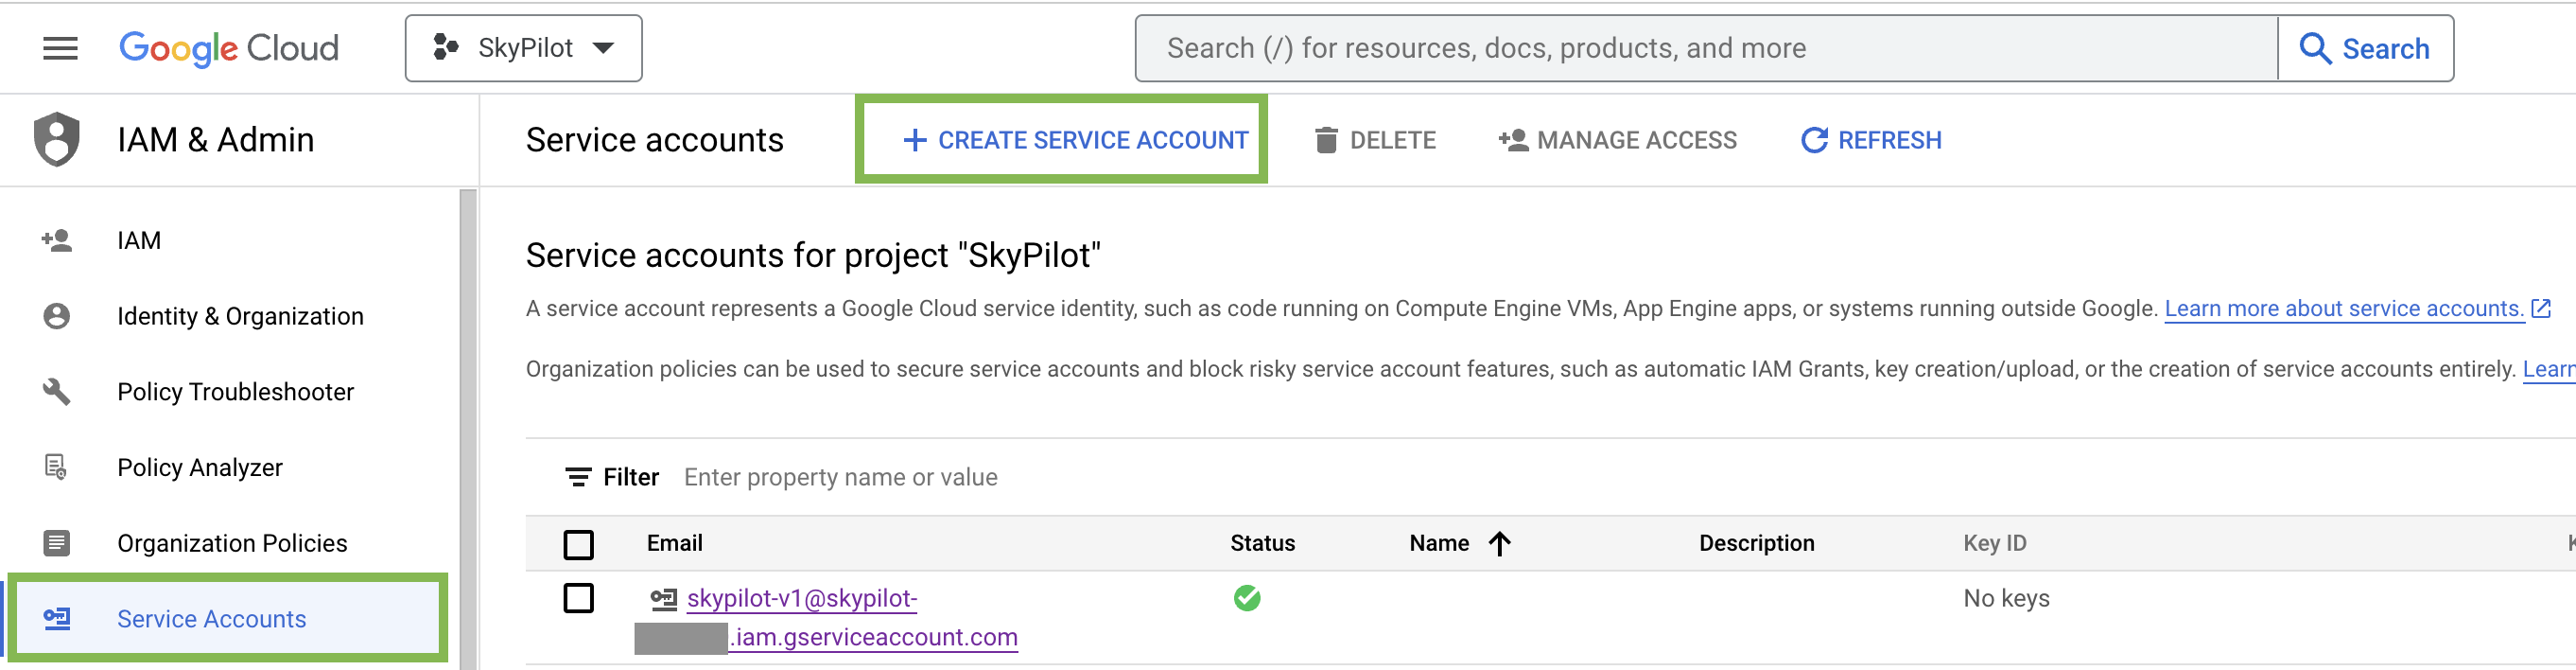
Set the service account id to
skypilot-v1and click CREATE AND CONTINUE.
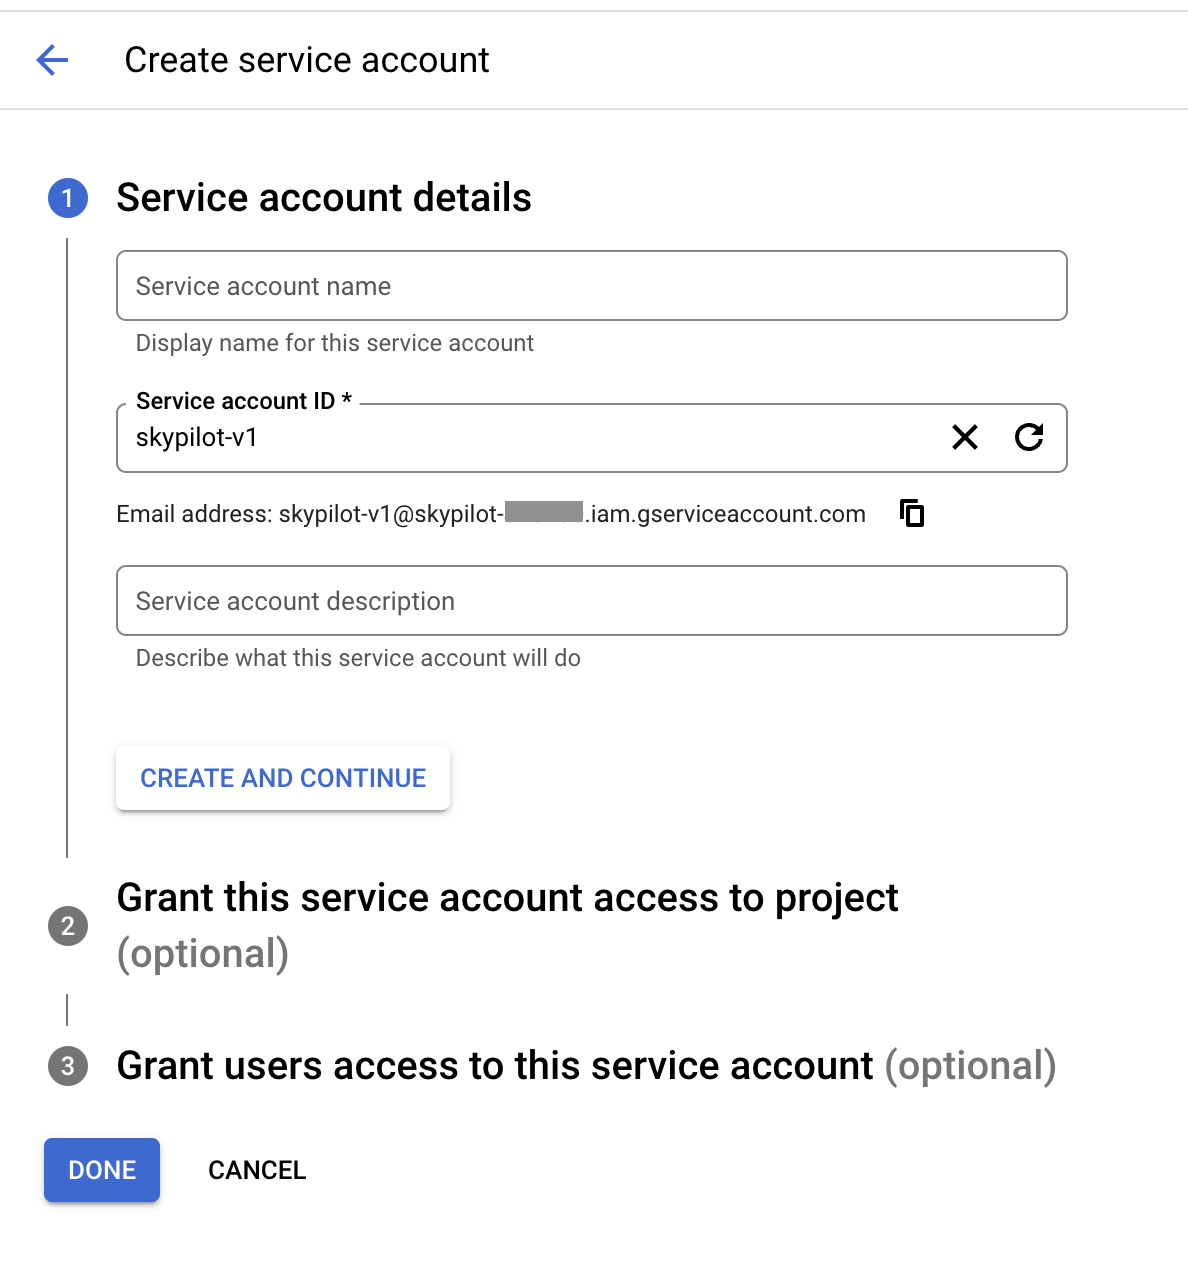
3. Select the minimal-skypilot-role (or the name you set) created in the
last section and click on DONE. You can also choose to use the Default or
Medium Permissions roles as described in the previous sections.
Firewall Rules#
By default, users do not need to set up any special firewall rules to start
using SkyPilot. If the default VPC does not satisfy the minimal required rules,
a new VPC skypilot-vpc with sufficient rules will be automatically created
and used.
However, if you manually set up and instruct SkyPilot to use a custom VPC (see below), ensure it has the following required firewall rules:
# Allow internal connections between SkyPilot VMs:
#
#   controller -> head node of a cluster
#   head node of a cluster <-> worker node(s) of a cluster
#
# NOTE: these ports are more relaxed than absolute minimum, but the
# sourceRanges restrict the traffic to internal IPs.
{
    "direction": "INGRESS",
    "allowed": [
        {"IPProtocol": "tcp", "ports": ["0-65535"]},
        {"IPProtocol": "udp", "ports": ["0-65535"]},
    ],
    "sourceRanges": ["10.128.0.0/9"],
},

# Allow SSH connections from user machine(s)
#
# NOTE: This can be satisfied using the following relaxed sourceRanges
# (0.0.0.0/0), but you can customize it if you want to restrict to certain
# known public IPs (useful when using internal VPN or proxy solutions).
{
    "direction": "INGRESS",
    "allowed": [
        {"IPProtocol": "tcp", "ports": ["22"]},
    ],
    "sourceRanges": ["0.0.0.0/0"],
},
You can inspect and manage firewall rules at
https://console.cloud.google.com/net-security/firewall-manager/firewall-policies/list?project=<your-project-id>
or using any of GCP’s SDKs.
Using a specific VPC#
By default, SkyPilot uses the following behavior to get a VPC to use for all GCP instances:
First, all existing VPCs in the project are checked against the minimal recommended firewall rules for SkyPilot to function. If any VPC satisfies these rules, it is used.
Otherwise, a new VPC named
skypilot-vpcis automatically created with the minimal recommended firewall rules and will be used. It is an auto mode VPC that automatically starts with one subnet per region.
To instruct SkyPilot to use a specific VPC, you can use SkyPilot’s global config
file ~/.sky/config.yaml to specify the VPC name in the gcp.vpc_name field:
gcp:
  vpc_name: my-vpc-name
See details in Advanced Configurations. Example use cases include using a private VPC or a VPC with fine-grained constraints, typically created via Terraform or manually.
The custom VPC should contain the required firewall rules.
Using Internal IPs#
For security reason, users may only want to use internal IPs for SkyPilot instances.
To do so, you can use SkyPilot’s global config file ~/.sky/config.yaml to specify the gcp.use_internal_ips and gcp.ssh_proxy_command fields (to see the detailed syntax, see Advanced Configurations):
gcp:
  use_internal_ips: true
  # VPC with NAT setup, see below
  vpc_name: my-vpc-name
  ssh_proxy_command: ssh -W %h:%p -o StrictHostKeyChecking=no myself@my.proxy
The gcp.ssh_proxy_command field is optional. If SkyPilot is run on a machine that can directly access the internal IPs of the instances, it can be omitted. Otherwise, it should be set to a command that can be used to proxy SSH connections to the internal IPs of the instances.
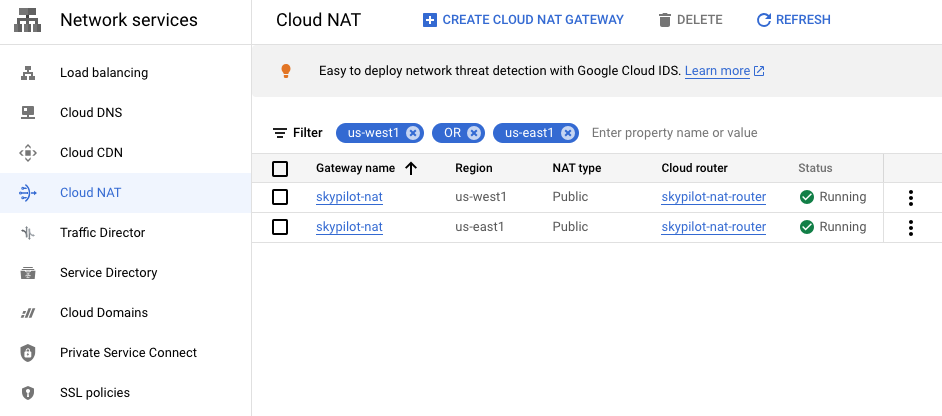
Cloud NAT Setup#
Instances created with internal IPs only on GCP cannot access public internet by default. To make sure SkyPilot can install the dependencies correctly on the instances, cloud NAT needs to be setup for the VPC (see GCP’s documentation for details).
Cloud NAT is a regional resource, so it will need to be created in each region that SkyPilot will be used in.
To limit SkyPilot to use some specific regions only, you can specify the gcp.ssh_proxy_command to be a dict mapping from region to the SSH proxy command for that region (see Advanced Configurations for details):
gcp:
  use_internal_ips: true
  vpc_name: my-vpc-name
  ssh_proxy_command:
    us-west1: ssh -W %h:%p -o StrictHostKeyChecking=no myself@my.us-west1.proxy
    us-east1: ssh -W %h:%p -o StrictHostKeyChecking=no myself@my.us-west2.proxy
If proxy is not needed, but the regions need to be limited, you can set the gcp.ssh_proxy_command to be a dict mapping from region to null:
gcp:
  use_internal_ips: true
  vpc_name: my-vpc-name
  ssh_proxy_command:
    us-west1: null
    us-east1: null